Xenserver
Xenserver is a operating system that is installed to create virtual machines on a host. The operating system does not have a graphical interface on the server itself but is managed through a web interface.
Contents
Compatibility
| Manufacturer | CPU | Model | Xenserver 6.2 |
|---|---|---|---|
| HP | L5420 | HE_Proliant_SE1101 | Yes |
Installing Xenserver
If you got the 4x146GB SAS RAID10 server you need to disable hardware raid or install Proxmox manually.
Thanks to Dacentecs automatic OS-install tool you don't have to download Xenserver to your local computer and then upload it to your server. You can simply choose it in the install tool in the client area. If you want to install it manually yourself, Xenserver can be downloaded from xenserver.org.
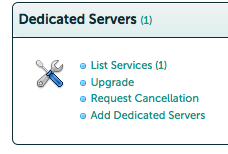
Log in to the client area on Dacentecs website. Under dedicated servers, click List Services,
then choose the server you want to install on,
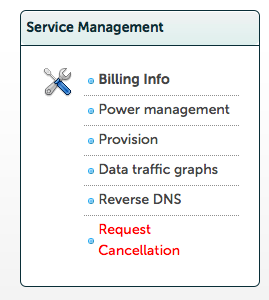
hit provisioning,
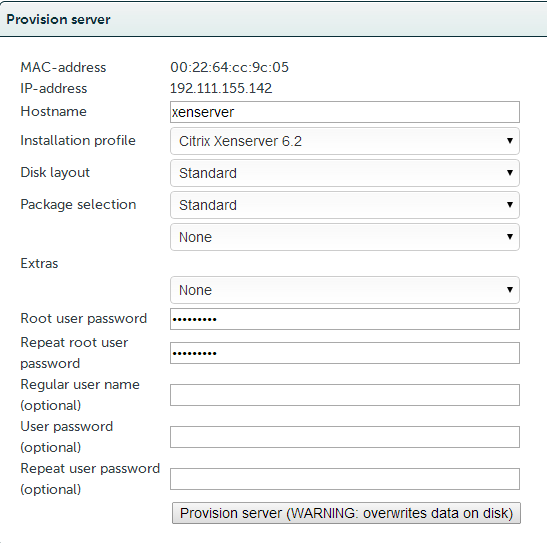
choose Xenserver in the OS-list, enter a hostname, make sure you enter a root password and then customize the settings if you want to.
Thats it, Xenserver is now installed!
Managing
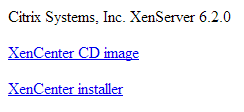
When you have installed Xenserver, enter the ip of your server into the address bar in your browser and download XenCenter.
(Of you have Linux you can use OpenXenManager or if you are using a Mac check out xvp.)
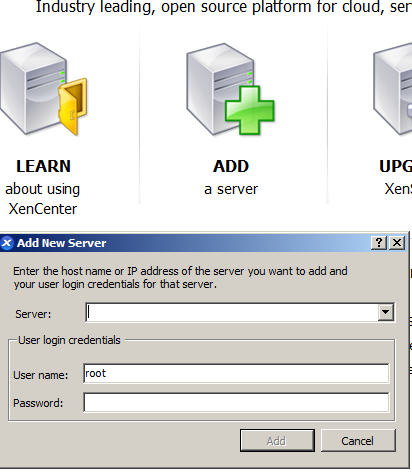
When you have installed XenCenter, launch it and click the "Add Server" button. Enter the IP, username (root is the default) and password you choose during the provisioning or installing.
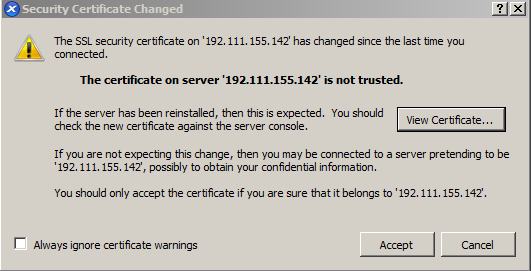
Because it's a self signed certificate it will display a warning. You can choose to always ignore certificate warnings and the warning will not be displayed again.
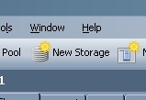
The first thing we want to do is to locate our ISO-files. To do this simply follow the wizard that pops up when you press the "New storage" button in XenCenter.
To use a local ISO storage follow this guide.
Creating VM's
Click the New VM button
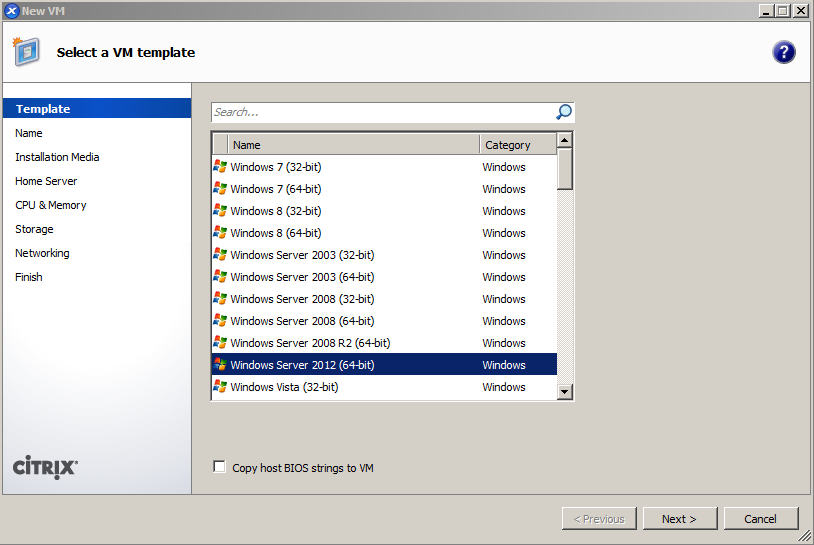
Choose what OS you want to create in the list. In this guide I'll create a Windows Server VM so I'll choose Windows Server 2012 64 bit in the list.
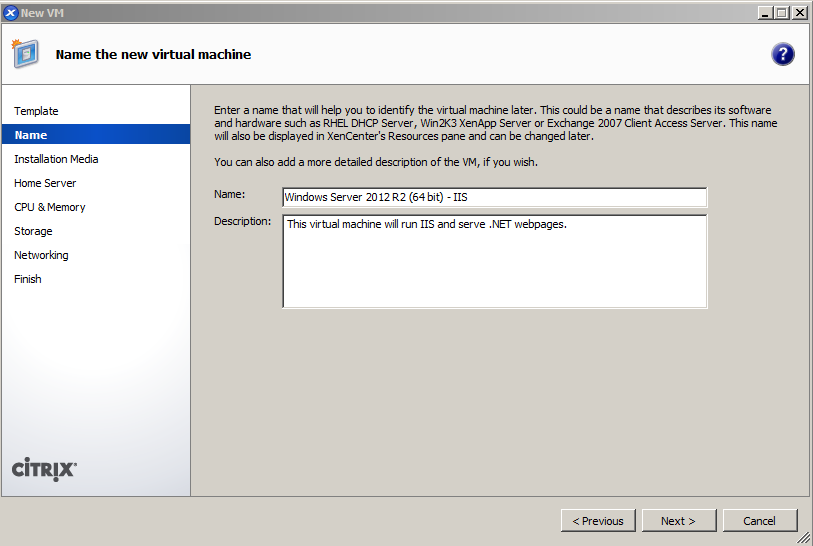
Enter a name and description for the VM.
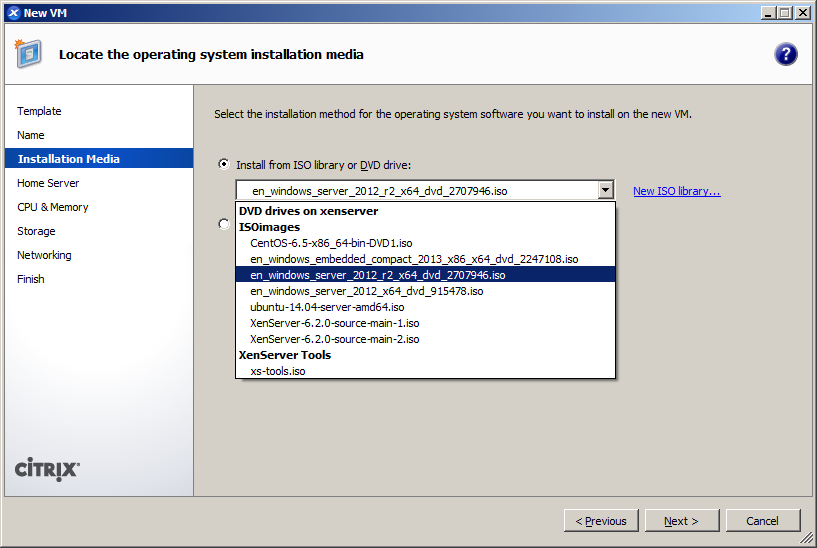
Choose the ISO-file in the ISO-list.
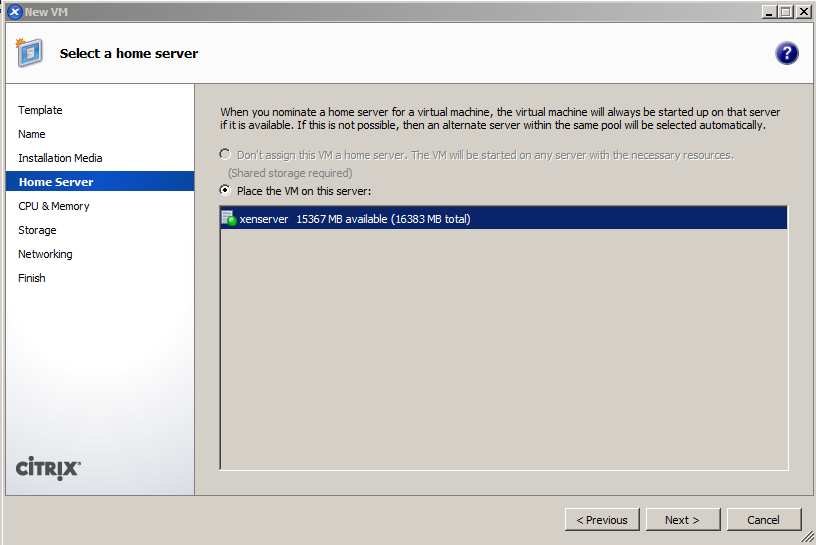
Then choose what server to install to, since I only have one server in my cluster I'll choose that one.
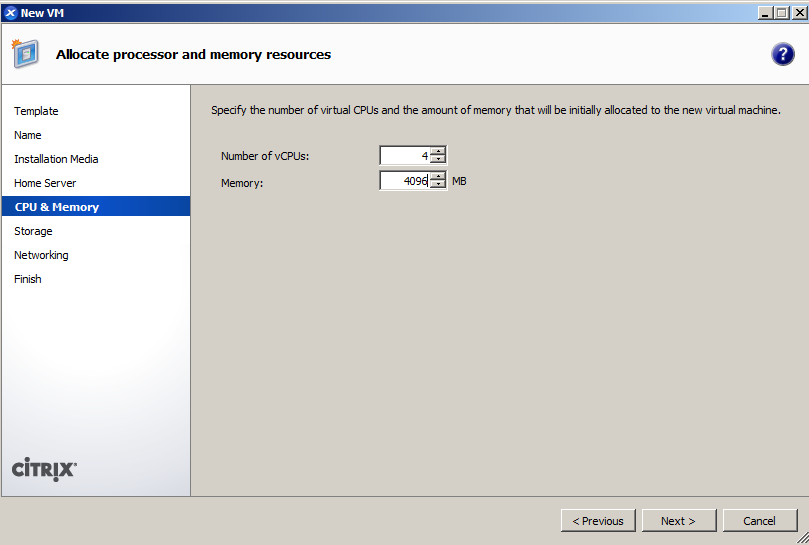
Allocate the resources you want to the VM.
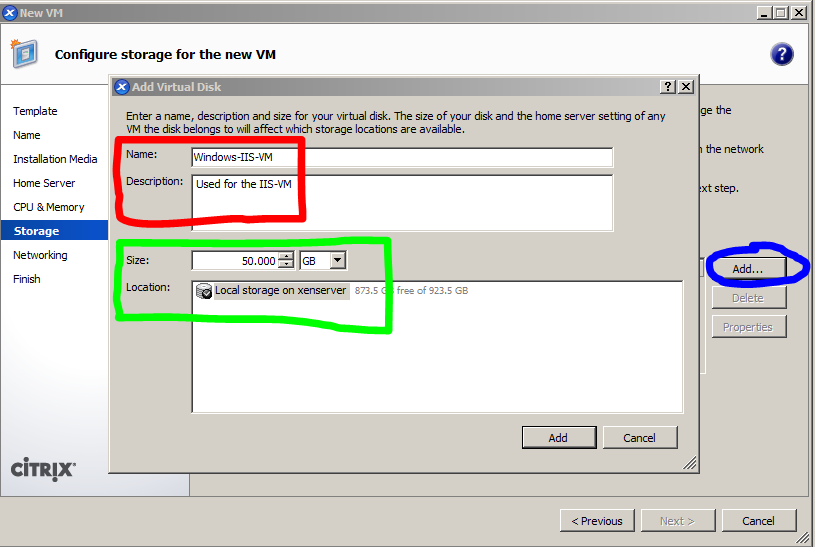
If you already have created a virtual hard drive simply choose it in the list. I need to create a virtual hard drive not so I'll click add (blue). In the dialog I'll enter a name and description (red), size and location (green) for the virtual hard drive.
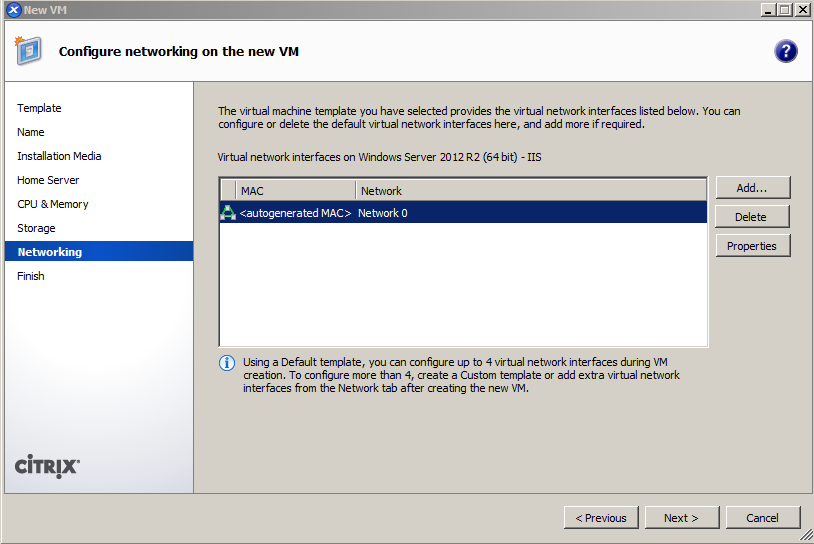
Choose the network interface you want to use for the VM. If you have multiple network drops you can distribute your load across your interfaces.
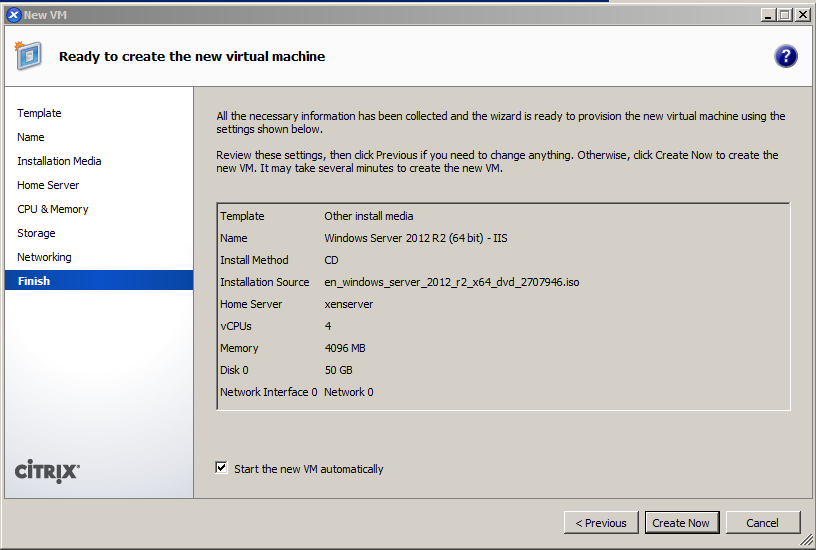
Look over the summary and check that all settings are to your liking and then hit Create now.
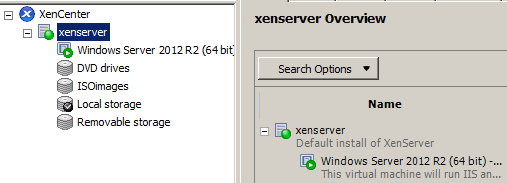
In the list you'll now see your newly created VM.
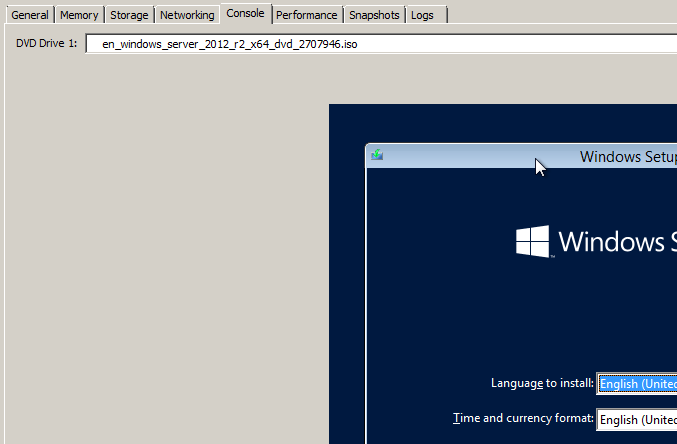
To use the VM, go to the Console Tab when you have selected your VM.
If there is any user input required for your VM-OS to be installed use the console to control the VM.
Network connectivity
When your VM is installed and up and running it won't have any Internet connectivity. You'll have to manually assign your VM's with IP addresses.
You'll need a IP per VM. Check the Extras page for ordering.
You can use Google's public DNS servers with the IPs 8.8.8.8 and 8.8.4.4 for DNS-lookup.
Windows
Go to the control panel, choose "Network and Internet", click "Network and Sharing Center" and click "Change adapter settings" in the left-side menu
or enter
Control Panel\Network and Internet\Network Connections
into a Windows Explorer window.
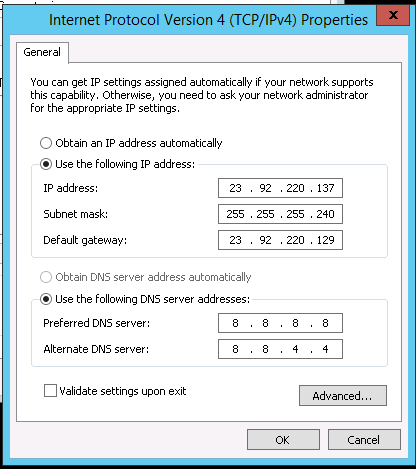
Then double-click the interface, click "Properties", double click "Internet Protocol Version 4 (TCP/IPv4)" and fill in the fields accordingly.
With my configuration:
I would use this configuration
Click "Ok", then "Ok" again, then Close and now your VM should have Internet connectivity.
Debian and Ubuntu
If your created a Debian or Ubuntu VM go to the command line of the VM and do the following.
type
vi /etc/network/interfaces
and hit enter.
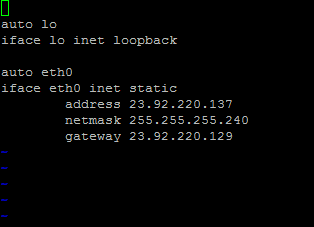
With my configuration:
I would use this configuration
       auto eth0
       iface eth0 inet static
       address 23.92.220.137
       netmask 255.255.255.240
       gateway 23.92.220.129
Insert the information in to the file. (Press I to edit the file, when you are done, press ESC and type :wq! and hit enter to save).
It would look something like this,
Replace address with one of your "free" addresses, netmask with your Mask, and gateway with your gateway.
When you are done type
service networking restart
and hit enter.
Now you could test your connectivity by writing
ping 8.8.8.8
To stop the ping press CTRL and C at the same time.
If the ping is successful it would look something like this,
CentOS
If your created a CentOS VM go to the command line of the VM and do the following.
type
vi /etc/sysconfig/network-scripts/ifcfg-eth0
and hit enter.
With my configuration:
I would use this configuration
       DEVICE="eth0"
       BOOTPROTO="static"
       IPADDR="23.92.220.137"
       NETMASK="255.255.255.240"
       ONBOOT="yes"
       GATEWAY="23.92.220.129"
To enable this network I would type
ifup eth0
Now the network connection should be established.
Guide written by Fredrik Vittfarne
